Ammunition Can Speaker
Intro
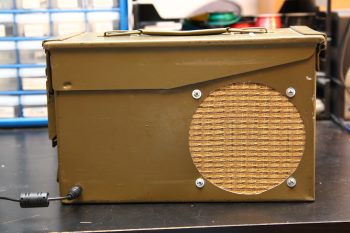
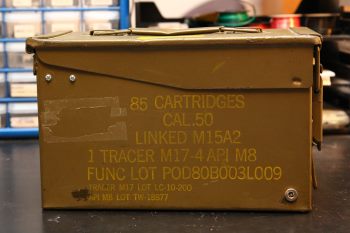
I was looking for an electronics project I could build after teaching
myself to solder (by building a lot of Velleman
3D Christmas trees) when I came across Ross Hershberger’s Monobox
amplifier project. Right away, I knew I had to build
this. I tried to find a cigar box that would work, but didn’t have
much luck. But then I remembered that I had some old ammunition cans
laying around, and inspiration struck. It was a fun project
that came out great, and I continue to enjoy it as it makes a great
companion for my iPod.
This project was featured on the Make Blog: MonoBox
Mods: Same Circuit, Two Builds. Read on to learn what parts I
used, some of the difficulties I ran into, and to see a video of the
finished ammo can amp.
The parts
- Ammo can – the project calls for a an enclosure with
between .125 and .25 cubit foot of space. I had a hard time
finding a cigar box that met that criteria, so I decided to try some
ammo cans I had laying around. The .50 caliber can has right
around .25 cubic feet of volume, which is perfect. It’s a little
rough looking, but I think that works for this project. And best
of all, I already had it. But even if I didn't, .50 cal ammo cans
are relatively common and inexpensive. I've picked up a few at garage
sales and thrift stores, and Harbor Freight sells brand
new metal ammo cans at their stores and online.
- Components – I purchased several components from
Radio Shack at the time, since they sponsored the MAKE project and it
included a handy BOM for their store. Several additional parts were
ordered from Parts Express, including the grill cloth and
polyfill. For the film capacitors, I bought some vintage NOS caps
from an Ebay seller who specializes in guitar parts. Not because I
think they’ll give my amp “sweet vintage tone”, but because they were
cheap, the seller was in my state (so I got them quicker) and what the
heck, they look cool. For the cork gasket, I bought some cork
tiles from Walmart. I got 4 12"x12" tiles for $6.
- Speaker – The speaker is an Aura NS525-255-8A
purchased from Madisound
for less than $4. I chose it because it’s cheap, has good
sensitivity (89db) and the resonant frequency meets the suggestion from
the Monobox project page. If you look at the photos on the project
page, you can see that this speakers shows up in the photos, which led
me to believe that Ross may have tried it himself. I later heard
from Ross and he told me he had indeed bought some of these
himself. One problem he pointed out is that frequency response
drops off above 6khz. So a tweeter should be added, which I detail
below as a possible improvement.
Building and testing the circuit
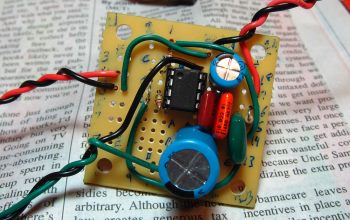
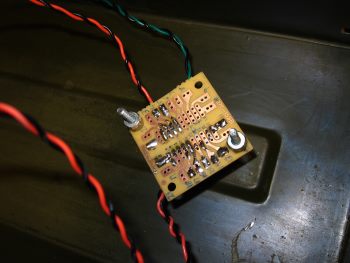
The circuit is fairly simple and easy to build, but I did run into a
problem. In a couple places, it’s necessary to insert two
wires/leads into one hole on the PCB. The vintage caps I used have
pretty thick leads, so inserting the .010µF and .022µf capacitors together
that make capacitor C1 was not possible without modification. It’s a
cheap trick, and certainly not a "best practice", but I ground down the
leads using a Dremel to make them fit. I had to do the same thing in
another spot where a lead and a jumper are inserted into the same hole.
With everything assembled, I fired it up and was pleasantly surprised to
find that the circuit worked on my first attempt using a small 3"
speaker. Success!
Building the enclosure and mounting the components
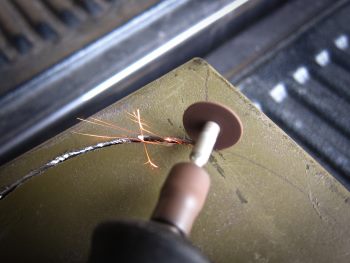
The ammo can needed a 5.25" hole cut out for the speaker and several
other holes drilled for mounting bolts and the power and signal
jacks. The hole for the speaker was the most work, but it came out
okay. I took my time, running two passes with a Dremel and a cutting
wheel (actually, 4 cutting wheels, they wear out fast on the thick
metal.) After cutting, I cleaned up the edge with the Dremel using a
grinding wheel followed by a sandpaper wheel. It’s not perfect, but
it came out much better than I expected.
The circuit board is mounted at the bottom of the can upside-down using
some 1" nylon washers to hold it up. A nice thing about the ammo can
is that there is a large indentation in the bottom to make the cans
stackable (so the handles have room.) This is nice because there’s
enough room so that any screws installed in that area are sunk in enough
to prevent them from interfering with the can sitting level on a table or
other flat surface.

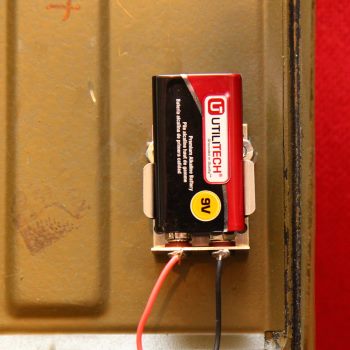
The speaker is mounted with the cork gasket and some nylon washers to
ensure it’s secure. I also mounted a toggle switch which allows for
selecting between the external power and an internally mounted 9v
battery. The switch is mounted inside to prevent it from being
damaged as the ammo can amp is hauled around.
Rattle, rattle, rattle
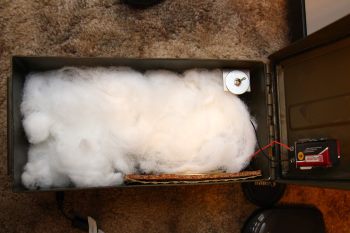
With everything in place, I stuffed the box with Polyfill, closed it up
and it was ready to go! Or so I thought. I found out quickly
that it had quite a rattle when the bass hit. This was occurring in
two places – between the lid overhand and the bottom portion of the can,
and between the lid and top carrying handle. To stop the rattle, I
cut up some scrap sweeper belts which are about .06" to .07" thick.
i bent the lid a bit to make room for them to fit. They’re glued in
place with E-6000. If you try this, keep in mind that belts are
generally smooth on both the ID and OD – they need to have the surface
roughed up a bit to get them to adhere to the glue. I didn't have to
do this since I had obtained some ground belts from work.
Finished!
I’m real happy with the finished ammo can amp. It has a vintage
feel to it which I like, due to the slightly rough condition of the ammo
can and the retro-looking speaker cloth (Parts Express #261-810).
The sound is good, not great; but it’s better than I had expected and
there is a possible solution to making it better which I get into
below. The main goal of this was to create a fun, portable speaker
with lots of DIY charm. In that regard, it exceeds expectations.
Possible modifications/enhancements
There’s a few things I’d like to try to make this project better.
- Add a tweeter – this one comes directly from
Ross. He left a couple comments on my monobox test video on
Youtube. As he points out, the Aura speaker is great, but it
doesn’t have much high-end. It drops off at around 6khz. He
suggests adding a a cheap tweeter with about 3uf capacitance in series
with it. Then add that in parallel with the Aura speaker. To
do this, I purchased a JAMO 2" paper cone tweeter from Parts Express ($2
clearance item) and some 3.3uf capacitors.
- VU Meter – From the front, the amp is too plain –
it’s an ammo can with a speaker. I have a couple old VU meters
made by Rauland in 1959 and I think one of those would look great in
this amp. They’re not “real” VU meters though, so I need a circuit
to drive one. JLM Audio’s VU buffer kit looks like my best bet as
it runs from a single rail. Unfortunately, shipping is
prohibitively expensive unless I buy multiple items (they’re in
Australia). I can’t justify spending $18 to ship a single $25
kit. So I’ll probably wait until I have a reason to buy more than
one.
- Pilot light – Sticking with the retro theme, I think
a large, jeweled pilot light would look great on this amp. Most
every jeweled pilot light I’ve seen is designed for AC power, but
they’re easy to convert using an LED. I had the process documented
on the Make Projects page, but I can’t find it since they redesigned the
site. I’ll post it on my blog at some point.
- More power – This thing actually gets pretty loud for
having just 325mw typical output power from the LM386. Based on
the datasheet and other information I’ve seen, it appears that the
LM386-3 could be used instead with no other changes to the circuit,
which would result in a typical output of 700mw. I don’t expect it
to make a huge difference, but it might help, especially if I add the
tweeter.
- Stereo – a stereo version with two monobox circuits
using the LM386-3 would be cool.
Back to Main Menu
Originally posted June 2, 2013 on my old site; posted here 3/28/2018
with a few revisions.


